A warm house in winter and a cool house in summer should not come with sticker shock. With the right home insulation and a few weatherproofing habits, many households can cut waste while keeping rooms comfortable. The best part is that most steps are simple, affordable, and friendly to an HOA setting.
How Home Insulation Cuts Energy Costs in HOA Communities
Heat moves to colder spaces. In winter, it slips out through the attic, walls, and gaps. In summer, heat creeps in through the roof and windows. Good home insulation slows that flow, so your HVAC runs less and lasts longer. That means steadier bills and fewer surprises.
In HOA neighborhoods, small upgrades add up. You do your part in your unit. Neighbors do the same. Common areas stay comfortable with less strain on shared equipment.
Start With a Quick Energy Check at home
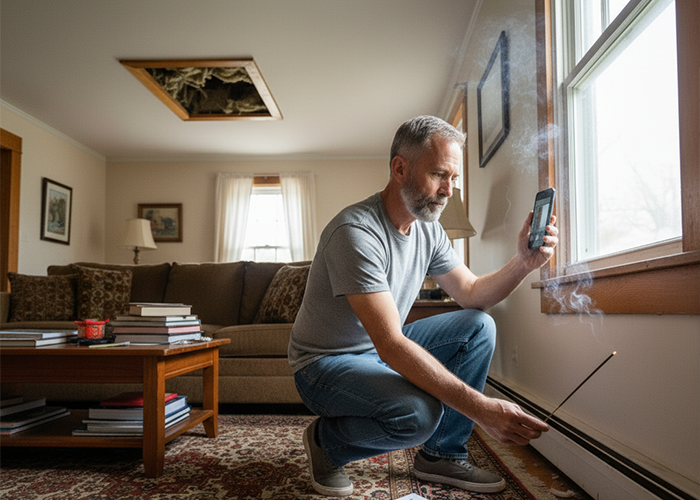
Before buying materials, look for clues. Drafts around doors or outlets, rooms that never feel right, and dusty insulation in the attic suggest weak spots. If your HVAC runs often but comfort still swings, you likely have air leaks plus thin insulation.
A simple walkthrough helps you set priorities. Take notes. Snap photos. Mark the worst leaks and the thinnest areas so you can fix them first.
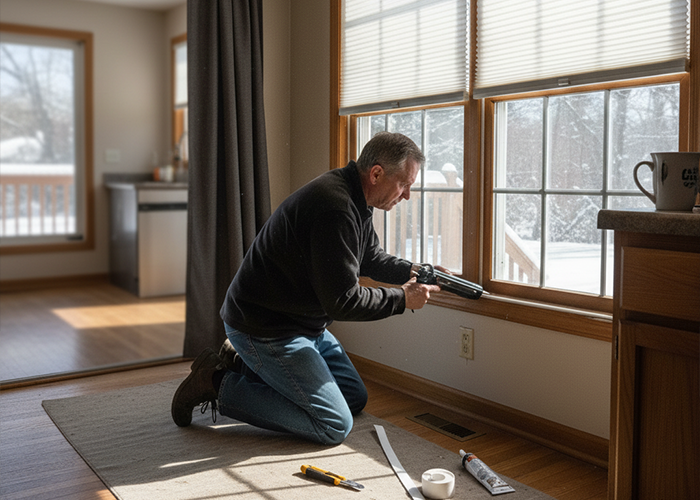
Seal the Leaks that Waste Heat and Air
Air sealing comes before adding more insulation. Otherwise, conditioned air pushes through gaps and takes your money with it. Focus on the big offenders: the attic hatch, recessed lights rated non-IC, plumbing and wire penetrations, and the rim joist above the foundation.
Use foam backer rod and caulk for small cracks. Try fire-rated foam where pipes pass through framing. Weatherstrip the attic hatch so it closes snugly. After leaks are sealed, your new or existing home insulation will actually perform as expected.
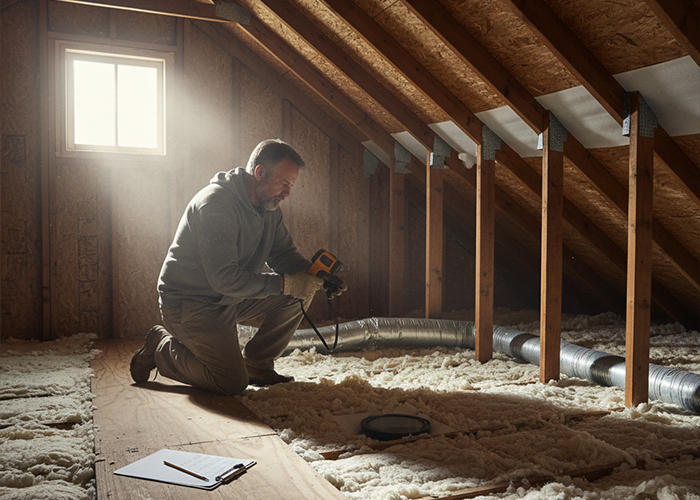
Upgrade Attic and Roof Insulation
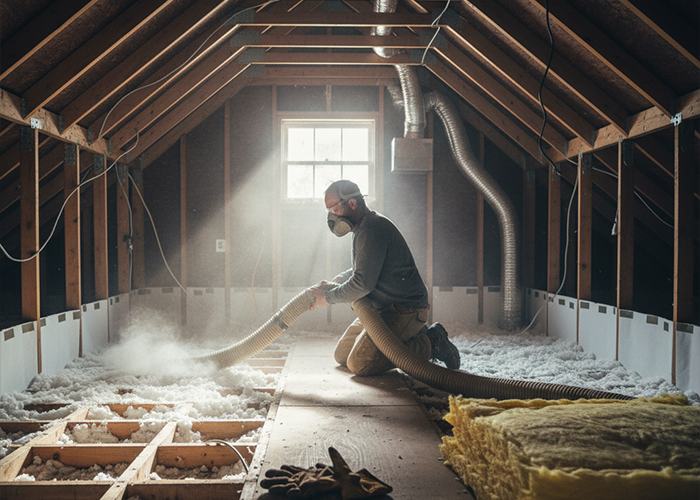
If you want the fastest win, start above your head. The attic is often the biggest source of loss. Fiberglass batts or blown-in cellulose are common choices that most homeowners can manage. Keep insulation even, avoid compressing batts, and maintain proper clearance around recessed lights and vents.
Do not block soffit vents. Your roof needs airflow to stay dry. Add baffles along the eaves to keep air moving from the soffit to the ridge while holding insulation in place. A well-insulated and well-ventilated attic works in every season.
Dial in Walls, Floors, and Crawl Spaces
Walls matter, especially in older homes without cavity insulation. Dense-pack cellulose or injected foam can boost R-value with minimal disruption. In rooms above garages or crawl spaces, cold floors point to missing insulation at the rim joist and between joists.
If you have a vented crawl space in a humid climate, moisture control is just as important. A ground vapor retarder and air sealing at the rim joist help protect home insulation and improve indoor air quality.
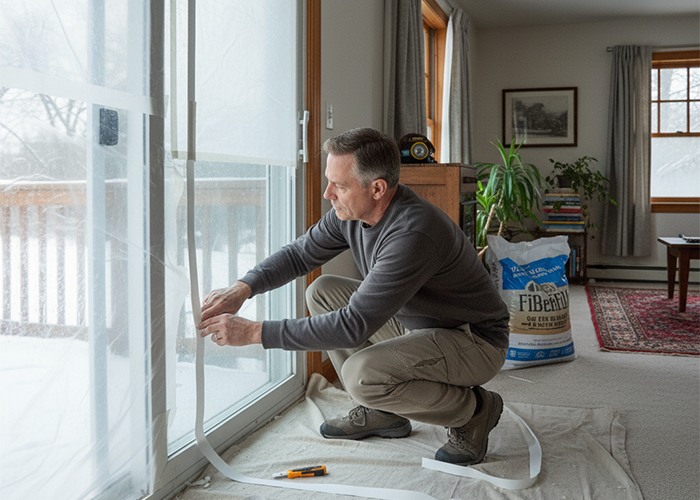
Improve Windows and Doors without Replacing Everything
Window replacement is not the only path. First, seal the frame perimeter. Add new weatherstripping to sashes and doors. Upgrade door sweeps so daylight is not visible under the slab. Thermal curtains and cellular shades cut heat loss in winter and reduce solar gain in summer.
If you eventually replace windows, look for efficient glazing and low-E coatings suited to your climate. Until then, these low-cost steps make a real difference.
Balance Ventilation and Indoor Air Quality
A tighter home is efficient, but it still needs fresh air. Spot ventilation handles most needs. Run the bath fan during and after showers. Use a range hood that vents outside when cooking. Keep dryer vents clean and secure.
For households that improve air sealing a lot, a balanced ventilation system may be helpful. Your HVAC contractor can suggest options that fit your layout and HOA rules.
Smart Thermostats and Simple Behavior Changes
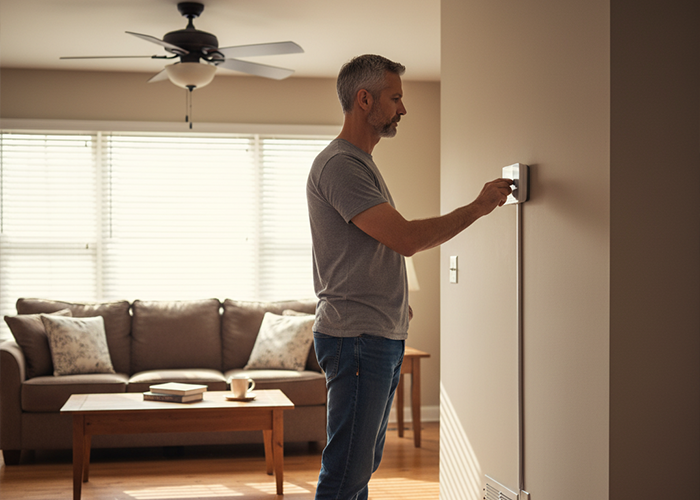
Technology helps, though it does not replace home insulation. A smart thermostat can trim run time when you are away and warm rooms before you get back. Ceiling fans improve comfort by moving air, which lets you set temperatures a bit higher in summer and lower in winter.
Small habits count. Close blinds on hot afternoons. Open them on sunny winter mornings to warm rooms for free. Keep supply and return vents clear so airflow stays strong.
Work With Your HOA on Common Areas and Rules
Many HOAs have guidelines for exterior changes. Check those before starting visible work like door replacements or window films. Ask about insulation in shared attics or wall cavities that affect multiple units. When communities plan together, upgrades cost less and performance improves for everyone.
If your HOA manages the building shell, report recurring drafts, roof leaks, or attic ventilation issues. Shared fixes often deliver the biggest savings.
Where House Insulation Makes the Biggest Difference
Think layers. Roof deck and attic first, then walls, then floors over unconditioned spaces. House insulation does its best work when gaps are sealed and ventilation stays clear. If you are unsure about wall cavities, a thermal camera scan or a quick contractor visit can guide you.
Homeowners in colder regions usually see major gains in the attic. In warmer regions, radiant heat from the roof is the daily challenge. Either way, the plan is similar: seal, insulate, and maintain airflow.
Budget Planning, Rebates, and Simple Paybacks
Start with the low-cost steps. Caulk, foam, and weatherstripping deliver quick returns. Then plan for bigger items, like adding attic insulation or upgrading a drafty entry door. Track seasonal bills so you can see the change over time.
Many utilities and state programs offer rebates for home insulation, air sealing, or smart thermostats. Save your receipts and take photos before and after. Those details often help you claim incentives.
Seasonal Home Insulation Checklist
Use this short list to keep projects manageable. A few items each season will move you forward without stress.
- Fall: Test weatherstripping on doors and attic hatch, seal obvious leaks, and add foam gaskets behind outlet covers on exterior walls.
Winter: Check for ice at roof edges, which can signal heat loss. Add more attic insulation if levels look low or uneven. - Spring: Inspect caulk joints outside and replace cracked beads, then clean and test bath and range fans.
- Summer: Close blinds on west-facing windows, consider reflective films where allowed, and verify attic ventilation is clear.
Materials that Fit Your Home and Climate
Fiberglass, cellulose, and spray foam each have roles. Fiberglass batts are widely available and budget-friendly. Blown-in cellulose fills gaps well in attics and many wall cavities. Closed-cell spray foam air-seals and insulates at once, which helps in rim joists or tricky framing.
Your climate zone influences target R-values. Colder zones need more depth in the attic and walls. Warmer zones focus on roof heat and air sealing around ducts. If you are unsure which material to choose, match the product to the task and your moisture conditions.
HVAC, Ducts, and the Hidden Energy Pathways
Insulation and HVAC work together. If ducts run through a hot attic or a cold crawl space, they should be sealed and insulated. Even small leaks add up. Mastic and foil tape rated for ducts stop air loss better than cloth tape.
Change filters as directed and keep returns clear. Then your system can do its job without pushing against clogs or leaks.
Moisture, Mold, and Why Details Matter
Warm, moist air meets a cool surface and condensation forms. That is why air sealing is so important before adding home insulation. It keeps humid indoor air from reaching cold layers where water can collect.
Dry materials last longer and resist mold. Vent bathroom and kitchen moisture outside, control ground moisture in crawl spaces, and keep outdoor gutters clear so water does not find its way in.
Insulation at home That Fits HOA Guidelines
Every community is different. Some allow interior upgrades freely while limiting exterior changes. If you need approval, present a short summary with product types, locations, and any visible impacts. When boards see clear plans that align with rules, approvals often move faster.
If common walls or attics are involved, offer to coordinate timing so crews can work efficiently. Joint projects usually cost less per unit.
Fire Safety and Attic Work
Safety comes first. Keep required clearances around flues and chimneys. Use dams around non-IC recessed lights or replace them with IC-rated fixtures that accept insulation contact. Do not bury junction boxes under new insulation. Label them so they stay accessible for future work.
When you hire a contractor, ask how they will protect these areas. Good crews know these details and follow them.
Putting It All Together: A Simple Plan
Start with air sealing. Add attic insulation to the recommended depth. Tune window and door seals. Improve ventilation where needed. Then, refine walls and floors as budget allows. Along the way, track comfort and bills so you can see progress.
Step by step, home insulation plus weatherproofing delivers steady comfort in every season. Your rooms feel better. Your HVAC works less. Your budget breathes easier.
Small Tweaks for Year-Round Savings
Energy savings come from many small choices made over time. With focused home insulation and smart weatherproofing, your living spaces stay comfortable and your bills stay in check. That is a win for you, your neighbors, and your HOA community.
Related Articles: